Gmod PM+ Guide
Updated for: v1.0
Introduction
This guide will walk you through how to use Gmod PM+, you do not need to be super advanced with making models to use this software, and this program has a very shallow learning curve to it, but it is strongly recommended that you do have very basic knowledge of 3D though, as for example skeletons, meshes, materials, and the other stuff not will be explained in this guide
Please note that this is not official software, it is simply software that is just meant to make it easier to port your models over to Gmod. Other Source 1 games have similar formats but I mainly designed this tool for Gmod, some stuff may be changed in the future
Before you start the program
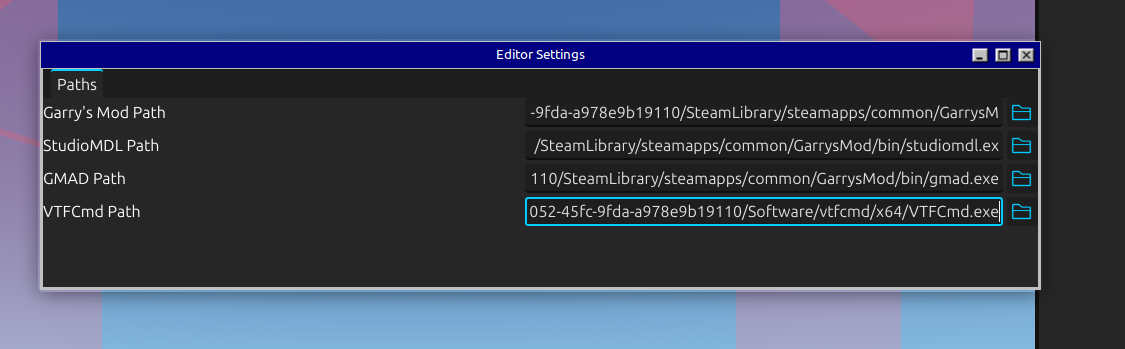
You need to have the VTFCmd program installed, if you don't have it you did not read the directions before downloading, or you did not download the software from one of my places. Additionally, make sure you use VTFCmd, not VTFEdit!
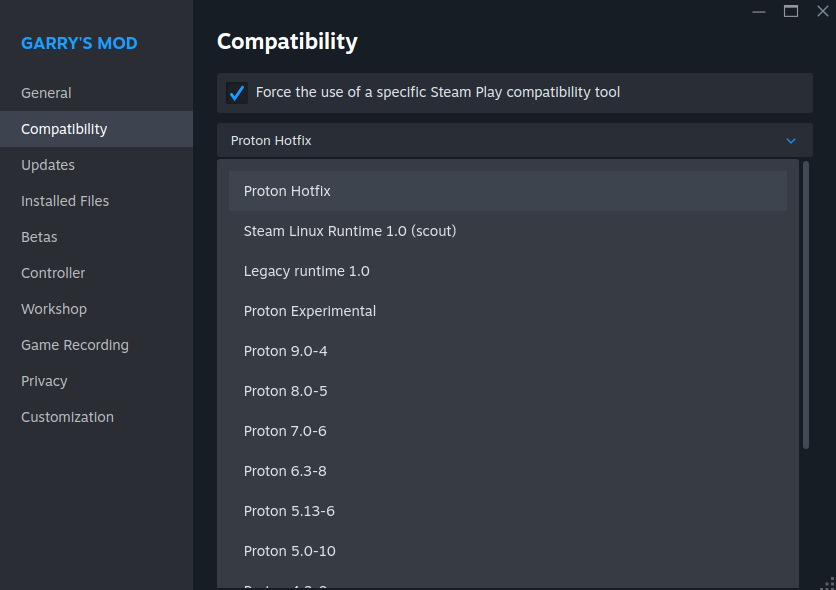
If you are on Linux, you need to have Wine on your system for the compilation to work, while the software is natively supported, the tools it uses to compile models aren't, and Garry's Mod does not provide the compilation tools if you use the native build of it, so you will likely need to switch to the proton version or use third party tools, which are not mentioned at all in this tutorial other than VTFCmd
Now when you start the program, the first thing you should do is open the settings under the "Editor" tab, now set all of the paths to the respective programs, for example in this image, although the paths for you are very likely different
Once you have done this, now you can start importing the model!
Importing the model
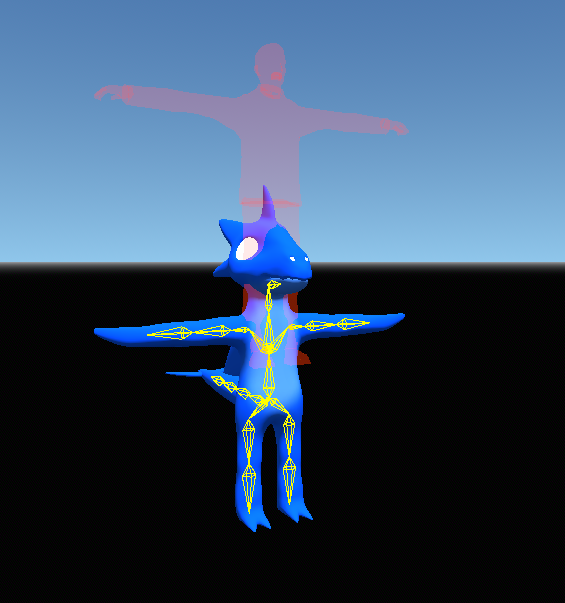
First off, your model will need to be in the format GLTF, not FBX or any other format just yet, to do that you can export the model as that format before, if you have done that, you can move on, for the example model I will be using one of my models I have made, Shark, to import a model, select "Import" under the "Model" tab
The materials import the textures fine for the most part, but given that the eyes aren't a texture, they will not import, I will go over the materials next since this doesn't look normal at all, if you don't include the fact that a shark can walk. Now here's a view of the materials tab:
Materials
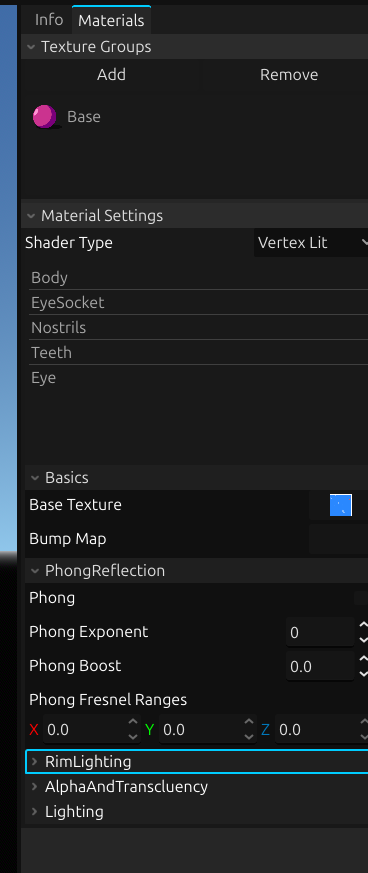
The parameters and what they do will not really be discussed, and you can search them up and find them on the source developer wiki, although in a nutshell you can change the textures, and the tabs in the material settings are the different materials, as for texture groups, they allow you to switch materials based on a slider, which means you can make your character have two skins, and there are two shader types, vertex lit generic is the one you will likely use the most, and unlit acts as an emission, with no light at all
The materials should be fixed now, and you can customize the materials how you want, although that is not important right now for porting the model, now let's focus on the bone renaming and reposing if necessary
Bones and posing
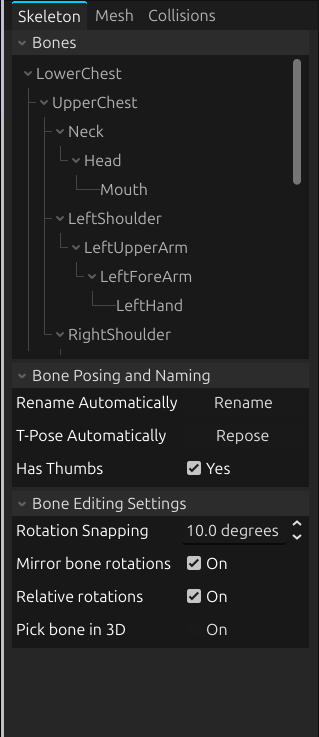
Normally renaming the bones to match the Valve Biped is not hard, just tedious, although you can skip this step for 95% of models, and the other 5% would be mostly, although before you rename your models, you may want to rename certain types of bones to gibberish, the reason for this is because it gets picked up by the filter based on name, for example if you have a pelvis area that contains your character's pelvis, rename the top one or you will get compilation errors or weird results, and some "sub" bones may fail to be detected as sub bones, so rename them if they shouldn't be renamed, although this does not really work for fingers
Once you rename, you should be good to go, if you get a warning, it's because you have too many or too few bones that got picked up, you may have to rename some to lower the number or add some bones before, even if they don't do anything to the model
Reposing is only needed if your model is not T-posing already, if so click repose, in general this should work 90% of the time, but if you get something weird you can manually rotate the boens with mirroring on, although you need to hold down control if you want snapping to have an effect, and mirror bones may not work as intended for all characters that don't follow normal conventions, mainly if you have relative rotations on
Reposing will not repose the fingers or the hand orientation to the best pose, in general, you want the hand to have the palm facing down with the fingers and thumbs in angles similar to the reference model
Having more bones to match the Valve Biped will generally look better, although not every bone is needed
Bodygroups and Jigglebones
The scale and offset parameters are for lining your character up to the red reference, try to make sure your character is at the same height relative to the feet, or else your character will either appear in the ground or off it, scaling is not strictly necessary but you can do it if it is needed
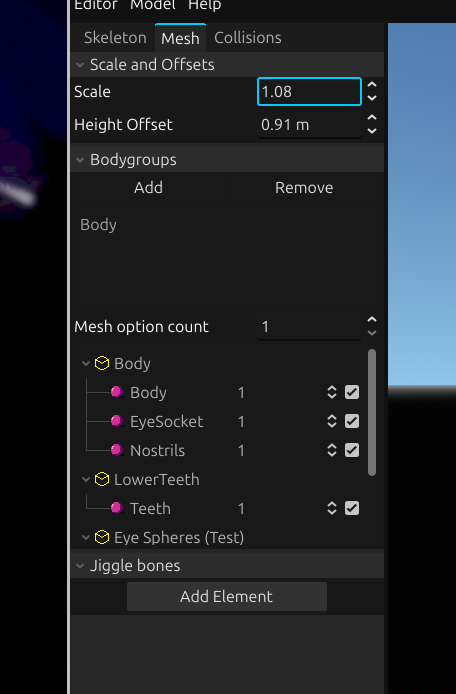
The bodygroups in a nutshell put meshes in groups, and they also let you have a slide so you can switch meshes on a certain setting, or even turn it off. To understand, the list below the buttons are the bodygroups the mesh has, the mesh count is just the amount of options you have, and then the meshes are split by materials, which you can check to indicate that the mesh belongs to the bodygroup, and set the number to indicate the index, if no material is set to the last index, it means blank which in turn means it can be turned off
The jigglebones have a start and end bone when you add some, you can search up what the other parameters do, although please note that the default of the pose does matter, so make sure the pose is good the way it is
Collisions
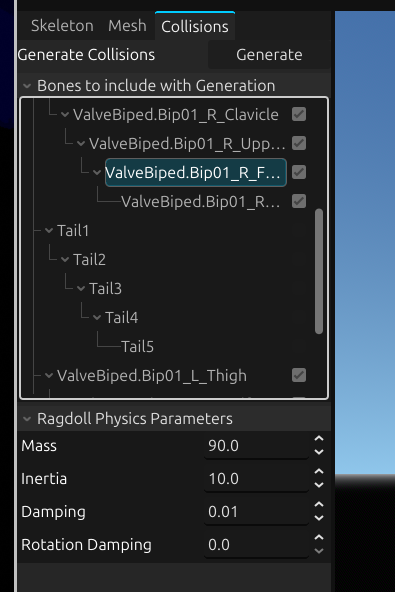
This step is not strictly required, but for example if you die or spawn the character, they won't have a ragdoll unless you do this step, this is very easy to do quickly, although a few things are important to know
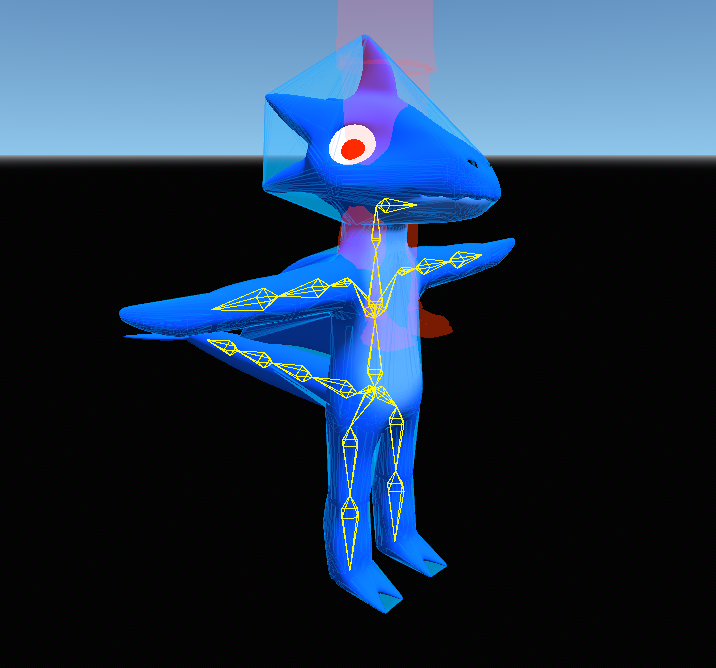
The checkboxes mean they will be taken into account for the collision, you would want to turn this off for stuff that would be too concave, or have physics normally, such as hair, cloth, tails, etc., and second, make sure one bone's collisions wouldn't overlap a lot with another from the idle pose, now you can hit generate collisions and get your collision results like this
Last touches and compiling
Yep, you're almost there, now we are just making sure of a few things and changing a few stuff before we compile the model, assuming you have done all of the previous steps, here is what to do next:
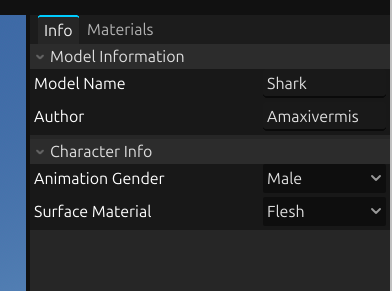
This image should be clear, but in case change the player name and author name to what you want besides the default, unless you want to credit me vaguely
The animation gender is not very important, but just pick the one you want, and the surface material is obvious, once you are done with everyone, you can compile the model by going to the "Model" tab and then hitting "Compile," it will freeze in the current version, and once it unfreezes and if you get no errors, you should have the addon in the addons folder in the game
Keep in mind that the folder that is the same name will be deleted if it's there, although you may get an error sometimes if this is the case, if so delete the folder before compiling, once you compile you can go into the game and have fun with your model! Currently, there is no publishing feature in the program at this moment, so you will need to look at other solutions
Common problems
There's a whole section dedicated to this in Help > Troubleshooting in the program, if something went wrong look here